

If you’re reading this, that means you’re ready to start growing your own veggies, fruit, and flowers, and that's huge! Once you get the hang of growing indoors you'll hardly ever need to purchase your own produce ever again.
But with great power comes great responsibility, though. so before we get started take a breath because we're diving deep into plant growing.
By deep we mean deep. Mediums, nutrients, temperatures, pest control, lighting schedules and much more. Think you're up for it?
Trust us, you're more than capable of growing your own flowers and produce. All you need is a little guidance and you're on your way to becoming the grower you always knew you could be, getting big yields in no time.
"Are you sure I can grow plants indoors?"
Of course, and then some! This guide is best for flowering and fruiting crops, and thankfully that covers the vast majority of plants. From orange trees to carrots to roses, most plants we know and love are grown generally in the same way. While the techniques and tips in our guide are the perfect roadmap to your dream harvest, some plants may require environmental conditions outside of what's outlined here.
So if you need to know everything you need to know about growing flowering and fruiting plants, how to harvest them, and how to keep stock all year long, this is the guide's your key to unlocking big time yields.
Ready? Let's get started!
Table of Contents
- Preparation
- Choosing Your Strain/Plant Type
- Choosing Your Grow Tent, Grow Room, or Greenhouse
- Choosing Your Grow Medium
- Choosing Your Grow Lights
- Grow Room Tools
- Daily Grow Room Maintenance
- Pre-Vegging Stage
- Starting Your Grow from Seeds & Clones
- Transplanting Seedlings and Clones
- Vegging/Growth Cycle
- Flowering/Bloom Cycle
- Harvest
PREPARATION
There's more to preparation than just clearing a space in your home or apartment to set up a grow room or grow tent. Much more.
From figuring out what kind of grow lights you're going to use to finding the right plant for your setup, prepping each grow is vital to your garden's success.
Throughout this Preparation section, we'll show you what you need to figure out what sort of plants you'd like to grow, where to grow them, and what you need to do to prep your garden to start growing.
Choosing Your Plant
Choosing the plant you want to grow is the first thing you should think of before starting. As you've heard- and will probably hear a lot in this guide- all plants are different and will require different growing environments.
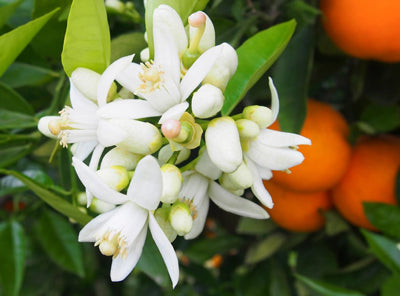
For example, ornamental flowers like roses need slightly higher temperatures than fruiting plants like orange trees do. They also require different humidity levels to survive, so keep in mind that different types of plants will require their own growing environments, nutrition, and training methods to give you the yield you're after.
That's why we suggest doing research on the exact plant you're interested in and choosing the one that'll be best for you and your growing conditions.
Not sure what to look for? No problem. Here are some key aspects you should think of when looking for the best strain for your grow:

-
Overall size of the full-grown plant- Like we mentioned above, the overall size of a strain is important to know for two reasons:
- Garden size- If you know the full-grown size of the strain you want to grow you'll get an idea of how big of an area you'll need to use. Size can also tell how many plants you can grow in that area, and we all know size=yield.
- Lighting- It's important to know how big your plant will be so you can figure out how strong your lights need to be. Too strong of a light and your plants will fry, too weak of a light and your plant won't grow. Depending on plant size and count you'll be able to calculate how many lights you need and how to position them in your grow.
-
Average yields- You'll want to get an idea of the yield your strain usually gives off in terms of quality, quantity, and size. A few questions you'll want to ask when strain hunting are:
- Will the harvest consist of big or small produce? The bigger the flower, fruit, or veggie, the more nutrition and lighting your plants need. Make sure you know what you're going to harvest so you can give your plants all the time and nutrition they need (not to mention getting big the right size containers to cure and store them in).
- How much should you expect to yield? We all know that yield is largely based on how well you care of a plant, but there's also a realistic expectation you should keep in mind when growing. If you're expecting huge yields out of plants that don't traditionally put out big yields you might be disappointed. Make sure you get the strain that gives you a yield you want.

- Long day plant vs Short day plants- Short day plants (SDP's) require a good amount of darkness and short periods of light. Long day plants (LDP's) want long periods of light and short periods of darkness. This is important to understand because each plant type needs their own specific feeding, lighting, and environmental requirements and they usually don't mix well with one another (we'll get in to that subject in a bit).
-
Flowering times- This one is vital. Nearly all plants eventually flower, but what that means and when it happens tells you a lot about your plants.
- Ornamental flowers have a limited time their pedals will stay at their most colorful before they die off.
- The pedals on a fruiting plant's flowers will eventually shrivel and die as fruit swells. This flowering period lets you know your fruit will start to take shape.
- In the case of lettuce, by the time it bears flowers it won't be of much use to you. When vegetables flower the parts of the plant we use- like the stalks, roots, and leaves- it's usually a sign that the rest of the plant might not be as useful as hoped.
- No matter what plant you're growing, it's important to understand how long it will take to flower, whether or not you want it to flower, and in the case of fruiting plants, how long from the time a flowering it will be until fruit appears. This will have an impact on how much light and energy you use, as well as the amount of nutrition and the types of nutrition you give your plants.

Choosing genetics isn't only about the species of plant you get. It also involves what state you receive those genetics in, and there are two main ways to start plant life: seeds and clones.
-
Seeds- When you start your garden the old fashion seed-in-the-ground way, you open up your future grow to a lot of benefits:
- Seeds are perfect for first time growers- We feel it brings your closer to your plants and makes you a better grower once you know how it's done naturally.
- Seeds are the source of all genetics- Whether you want to create your own strain or you want to hone in on the traits of a particular strain, you'll need to breed your plants. While seeds aren't 100% necessary to start growing, they are vital in breeding and enhancing strains.
-
Growing from seeds can often lead to more resilient plants- Keep in mind that a clone's job is to grow an entire plant from one leaf/clipping. Clones start off from a place of restoration, which can be taxing for the wrong clipping. Starting from a seed and keeping them well maintained usually results in stronger plants than clones.

- Clones- Clones will get you up and running quickly. That's why you usually see growers opt for clones over seeds, because while seeds might give you a stronger plant, seeds can't tell you the sex of the plant until it's too late. That's not all:
- With clones there's no need to pop seeds and possibly waste them. For example, if you pop seeds wrong and they don't grow or you get a plant you weren't looking for (we can't tell you how many growers needed female plants and grew males instead).
- Clones are already on their way toward a full grown plant and are identical to the plant it's cloned from, so you'll know the sex is what you need it to be ever time.
- Clones are perfect for growers who would like a quick turn-around. Popping seeds and then growing seedlings can be tricky, and while raising clones can also be tricky, rooting clones can be done pretty quickly. Hands down, if you want to grow right away consider finding or taking clones.
Choosing Your Grow Tent/Grow Room/Green House

Once you've figured out the type of plant you're looking to grow and how you want to start your garden, the next thing you'll want to look in to is where you're going to house your plants.
Are you going to buy a grow tent? Want to build a green house? Do you want to plant straight in the ground outside, or do you want to convert a room in your home or apartment?
These are the questions you'll want to think about when getting all of the pots, seeds, or clones to get started.
But before you get down to figuring out what sort of housing you want for your plants, you'll first want to figure out the canopy (the area of plants you're going to light) of your grow. To do that, there's a two-step approach:
- How much space do you want to allocate for your grow room- To know how big your garden can be, you have to know the grow space's limitations. Before you buy your clones or a bag of seeds, measure out the area you want to use to grow your plants to get an idea of how many plants you can hold in that space
- How many plants can you grow in that space- As a good rule of thumb, if you're not sure how big your buckets are going to be in that growing space, give your plants 2-4 sq.ft. per plant in that space you just measured. Divide that number by 2, 3, or 4 to figure out how many full-grown plants can live comfortably. The minimum is 1 sq.ft. per plant, so you may need to grab some buckets and measure it out yourself.
After you've measured out your space and have an idea of what it'll take to grow your garden, let's talk about how you're going to house them. At GrowAce we believe there's essentially three types of ways you can house your plants:

-
Grow Tents- Probably the most common among indoors growers, grow tents are increasingly convenient way of growing and housing your plants. Whether you need a place in your garage, somewhere in your room, or you need a tent the size of a whole room, you can likely find the tent you need to grow most any plant you can think of.
- Tents come in a wide range of styles and sizes for any grower and nearly any plant.
- With a tent there's no need to drill/mount hanging hooks or vents for lights and fans.
- In tents you have superior control over grow environment than in most other setups.
-
Grow Room- No matter if it's a closet, your bedroom, a garage, or a room in your house or apartment, there's no doubt that utilizing your own space can be more convenient than buying a tent. You can get fresh air in quicker and circulate it naturally throughout your garden.
- In a grow room there's no need to purchase a whole new tent, just equipment like reflective material and some fans to convert your room (which can be cheaper than a tent depending on the canopy you plan to grow)
- Grow rooms utilize the space you already have, including windows (ventilation) and power outlets so again, there's not too much to purchase to convert a room in to the grow of your dreams
- Bonus: in the right setting, you can utilize light from the sun to supplement light when lights are out or dying
-
Greenhouse- When growing inside just won't happen but you don't have tons of room outside either, think about building or buying a greenhouse. In a greenhouse you get all of the benefits of growing outdoors (temp, abundance of light) with the added benefit of indoor growing (supplemental lighting and ventilation)
- In a greenhouse you tend to save money on lighting by utilizing the sun’s light, which is actually one of the most optimum light sources available
- In the event you need extra lighting you only need T5's or lower powered HID's to hold you over until the sun comes back out (though you can always use LED or high powered HID's, too)
- There's also plant training techniques like Light Dep that help you get bigger plants in greenhouses
- Because they're already partially acclimated to outdoor environments, you have the potential to take greenhouse-grown plants out of the green house and plant them directly outside without lots of training like you would bringing indoor plants outside
Choosing Your Medium (Soil/Hydro/Coco)
Once you have an idea of the strain you want to grow and where you want to grow it, now comes the stage of preparation that's probably the most important part: choosing the medium you want to grow in.
Your medium will determine how many nutrients you use, what type of nutrients you'll use, how you feed your plants, and how challenging correcting issues will be.
There are three popular grow mediums to choose from with their own advantages and disadvantages, so be sure you make the right decision before growing those plants:
 Soil is the perfect all-purpose medium. Most soil doesn't need much supplemental nutrition because it's already loaded with nutrients. Heck, if you mix up your own super soil you can even eliminate around 90% of supplemental nutrition and just use water for the majority of a plant's life.
-
Pro's
- Great for beginners, lots of buffer room in terms of feedings and readings.
- Retains nutrients the best of all mediums (Needs little nutrients when you start, and all you do is add a little when your plants need them).
- Recommended Skill Level: Novice, Advanced, Professional.
-
Con's
- Plants generally take longer to grow in soil.
- Nutrient issues may not show up right away, and when they do it can be difficult to quickly fix (plants can get so sick in soil they’re beyond repair).
- Unlike hydro where roots will hang down in bucket, soil roots go all over the place and if you don’t have enough room for those roots you’ll get root bound plants, and those are never good.

Hydroponics is an all-water soil-less way of growing medium. It's a lot less messy than dirt, and if you run in to nutrient problems they're much easier and faster to fix than soil problems. Hydroponic grown plants even take less time than soil plants to harvest.
-
Pro's
- Nutrients are absorbed much faster than in soil.
- Hydro is usually faster growing than soil or coco.
- Recommended Skill Level: Advanced, Professional.
-
Con's
- There's no buffer when growing with hydro like there is with soil- one wrong step and your plants are going to feel it.
- Nutrient issues may be easier to fix than in soil, but you're likely to get more nutrient spikes with hydro than in soil.
- Because of moisture collection at the root level, basins and water sources need to be constantly checked and cleaned to prevent mold, fungus, and root rot.

Coco is the perfect middle ground between hydroponic and soil mediums. Though there's no nutritional value to coco like with soil the nutrition it receives tends to be held in longer than hydroponic applications. That means you won't have to run such a heavy flow of water like you would in hydro, yet you can assure your plants are getting nutrition from the very beginning instead of trusting soil has enough to carry you through to flowering
-
Pro's
- Retains nutrients much better than hydro but doesn’t hold on to them too long like soil can.
- These generally take a little longer than hydro to grow, but tend to grow a little faster than soil.
- Recommended Skill Level: Advanced, Professional.
-
Con's
- Nutrient issues can be tricky to resolve due to the semi-retainable medium.
- Not a ton of buffer when working with coco.
- If you don’t break down or mix coco properly you can spike the pH levels of your plants and harm them.
Choosing Your Grow Lights
We're almost done with the vitals of what you need to get started! Take a breath, we're almost ready to start growing.
After this step, all you have to do is grab some tools, nutrients, fill those buckets, and get going. But before we get to the easy stuff we have to figure out one last thing: what sort of light you're going to use to grow your plants.
Your light's one of the last things that are going to determine how much you'll be able to yield, how challenging it will be, and how much energy you're going to consume growing your plants.
As with most things in the grow room, all types of light you can use have their pro's and con's in the garden. Some add tons of heat to your grow, others don't give you enough power, and some even have too much power without adding a degree of temperature to your grow room's environment. Be sure to look at the benefits and challenges with each light before growing your plants under them:

High Intensity Discharge (HID) Grow Lights: HPS (High Pressure Sodium), Metal Halide (MH), Double Ended (DE) HPS/MH, Ceramic Metal Halide (CMH) Grow Lights
- HID's offer the closest light to the spectrum of the sun (HPS and MH bulbs).
- These give you the intense light necessary to grow big, healthy plants with huge yields from start to finish (especially when trained properly).
- Wide range of reflectors and wattages to suit any grower’s needs, so there's bound to be an HID for any application you need.
- Manufacturers like Yield Lab Grow Lights can grow anything under the sun: flowers, fruit, veggies, herbs, spices- anything.
- Wattage Recommendations:
-
Standard grow lights (regular HPS/MH) are your run-of-the-mill lights.
- 400w Grow Lights offer good coverage for 1-3 plants in a 2x4ft or 3x3ft area.
- 600w Grow Lights are strong enough for 3-4 plants in a 4x4ft or 5x5ft area.
- 1000w Grow Lights are the strongest of all standard grow lights and can grow around 5-6 plants in a 6x6ft area.
-
Double ended grow lights are much more intense than standard single ended bulbs because of the dual base connections they offer, firing from two connections instead of a single connection at the base of the bulb.
- 600w's are intense versions of their standard counter parts and can cover a 4x4ft or 5x5ft area with ease.
- 1000w's are probably some of the strongest lights on the market, and can cover 6x6ft and 8x4ft growing spaces easily.
-
CMH Grow Lights give you an even spectrum of light without too much blue or red spectrum. These lights have a ceramic base that will outperform single and DE lights of similar wattages because of their ability to fire at high wattages.
- 315w's are strong enough to cover a 2x4ft or 3x3ft growing space without pulling all of the energy a 400w light would.
- 630w's will be able to cover a 5.5x5.5ft area with light easily without using the energy a 1000w light would.
-
Standard grow lights (regular HPS/MH) are your run-of-the-mill lights.

LED Grow Lights: Giving your plants the exact spectrums they need and nothing they don't, LED's are a great way to give your plants the light the need without giving them excess heat or spectrums they can't use.
- LED's have the ability to pinpoint the exact wavelengths of light plants absorb and gives them that- nothing that the plant will waste like HID’s do.
- Yield quantity may not be as much as HID’s but LED yields tend to give you more flavorful, sticky, and overall higher quality harvests.
- Intense spectrums from HID’s can give your plants properties that other lights may not (i.e. UV and IR for resin).
- The light generated has intense wavelengths, so moving them in too close will cause bleaching to your plants.
- LED manufactures like Advance Spectrum specifically engineer the light spectrum for indoor growing:
-
Supplemental grow light lights (14-50w range, with a few high powered lights)
- These lights offer a limited spectrum range (all blue, all red, dual or tri-band).
- LED's fill in gaps of light your main lights are missing.
- These are used for very specific purposes, so they're not great on their own unless you’re growing grass or herbs.
-
Full Spectrum LED Grow Lights (180w-1000w range)
- Full spectrum LED's give your garden a wide light spectrum that covers pretty much all spectrums you plants need. The problem with HID's is that they give plants too many spectrums to process, and plants end to waste them.
- These tend to outperform an HID of the similar wattage in terms of quality. For example, a 400w LED will outperform a 400w HID with the same spectrum output because of the spectrums LED's offer.
-
Supplemental grow light lights (14-50w range, with a few high powered lights)

T5 Grow Lights: Offering a limited amount of heat, these lights are similar to HID's because they have "grow" (vegging) and "bloom" (flowering) spectrums and much more. Despite their limited power and lower-yielding harvests, T5's are a great alternative for growers who want to grow plants without using lots of energy and without bleaching plants like LED's can.
- You can grow nearly anything with these, but because they’re not as strong as other lights those plants will remain pretty small.
- T5 grow lights run 75% cooler than HID’s.
- Yields are generally small with these lights, but they will definitely work to get you a yield in a pinch.
- Wide range of sizes to cover the canopy you want to grow.
- Great for herbs, spices, clones, and growing flowering plants in a pinch.
Tools
Throughout your experience in growing, you're going to pick up lots of different tools: meters, scissors, gloves, controllers, etc... There are lots of tools that can make your time in the grow room, but when you're starting out there are four key tools you'll need before starting your new garden:

- Hygrometer- They're know by a few different names, but hygrometers are vital in your garden. Whether they're reading the temperature of your garden, the humidity levels, CO2 levels or all three (and more), you need to keep an eye on the environment of your grow room. Sure, you may be able to feel how hot or humid it is you. However, a hygrometer will tell you exactly what's going on in your garden's environment so you can make adjustments as necessary.
- Pruning Shears- From taking off dying leaves to training your plants to clipping new clones, you'd be surprised how important shears are in your grow room. Shears will help you get a clean cut off your plants, and that's going to be important for the entire plant. Improper removal of leaves can lead to unnecessary damage to your plants, and unnecessary damage means your plant needs to send energy to that part of the plant to heal and that'll hinder growth.
- pH/PPM meters- No matter if you're growing in hydro or soil, you need to know the pH level of the nutrient-rich water you're feeding your plants to assure it's not poisoning your plant. PPM (parts per million) are good to keep an eye on to make sure your plants aren't eating too much or too little.
- Microscope- Whether you're looking for the sex of your plant, you're checking out suspicious spots, or you're searching for bugs, a microscope is going to be what you need to spot tiny features of your plants.
- Bonus: Heat Thermometer- It's always a good idea to see how much heat you have around your canopy, but you can't exactly set up a thermometer to read that easily, can you? That's why it's good to invest in a heat thermometer that can read the temperature of a given surface or area not easily measured by other readers.
Daily Maintenance
No matter if you're growing indoors or outside, every day in the garden presents a different challenge. pH and PPM levels can spike, temperatures can go out of control, and don't even get us started on pests...
Without daily maintenance one problem can lead to another, and after a while a small problem becomes the reason why you waste an entire grow. Take about 10 minutes a day to perform these simple checks and you'll be able to maintain a high-harvest grow and get ahead of any issues you run in to:
1. Check pH Levels
For hydroponic gardens, calibrate your meters then measure the water in your reservoir. For soil and coco, water your plants and test the run off’s levels pH too low= toxic to your plants, too high= growth decrease.
That’s why you want to have the perfect level of acidity in your water, which will be around 5.5-6.0. When pH is too high, use pH Down to level it out; when pH is too low use to regulate those levels. Here's what different pH levels look like and the effect they have on your grow:
- 3.5 and below: Plants experience root damage
- 4.0-4.5: Plants experience poor nutrient uptake
- 5.0-5.4: Good pH Level
- 5.4-5.8: Perfect pH Level
- 6.0-7.0: Acceptable pH Balance
- 7.5-8.0: Plants experience poor nutrient uptake
- 8.5 and above: Plants experience root damage
2. Check PPM Levels
PPM levels are an idea of how many elements are physically available in your feeding solution, which is important to know to make sure you’re not overloading your plants with too much food.
- Seedlings: 100-250. Nutrients aren’t really needed here, hence there’s not a lot of particles needed.
- First Half of Vegging Cycle: 300-400 - This is usually after you transplant, which still don’t require many nutrients.
- Second Half of Vegging: 450-700 - You’ll start giving your plants more nutrients at this stage.
- First Half of Flowering: 750-950 - Your plants will be eating more as they grow, so they’ll be taking in more nutrients.
- Second Half of Flowering: 1000-1600 - This is when your plant’s eating the most, especially if you give it additives.
- End of Flower, Entering Harvest: As close to 0 as possible - This is when you’ll be flushing your plants, so you don’t want there to be a lot of particles left over.
3. Check Your Grow for Pests
Remember: your garden’s a pest’s grocery store, so it’s a good idea to give a once-over every day to make sure they’re not being eaten. Check tops and bottoms of leaves, floors, walls, buckets, and medium to make sure there aren’t any pests, mold, or fungal build up.
This is especially important for you outdoor and greenhouse growers, because your plants are exposed to more pests, molds, and fungi than indoor plants including rodents (rats, rabbits), and high amounts of mold & fungal spores.
4. Inspect Leaves for Signs of Nutrient Deficiencies
When your plants aren’t getting the nutrition they need they won’t give you the yield you want. If your garden’s free of pests but your plant’s leaves are curling, turning yellow or brown, becoming brittle, or just don’t look right they might be experiencing a nutrient deficiency.
Check the color of your plants once a day to make sure they’re not telling you there’s something wrong. Inspect deficiency charts and your nutrient bottles to diagnose the problem and supplement your plants with the missing elements it needs.
5. Check Environmental Conditions
Temperature, humidity, and CO2 levels are among a few of the environmental conditions you need to inspect daily to assure vital processes like photosynthesis and transpiration are possible within your garden. *Note: temperature drops should only be within 10-15°F after lights are off.
- Clones & Seedlings: 72-82°F @ 70-75% Humidity
- Vegging Stage: 68-78°F @ 50-~70% Humidity
- Flowering Stage: 68-77°F @ 40-50% Humidity
- Harvest: 65-75°F @ 45-55% Humidity
6. Check the Filters in Your Grow Tent or Grow Room
It’s a good idea to check filters around your garden, especially for indoor and greenhouse growers. Whether it’s to assure your plants can breathe without dust clogging their stoma or if you need to hide smells, a clean filter is pretty important when growing your own.
If you can smell the aroma of your grow from about 3” away from your filter, or you start experiencing lots of dust build up in your grow area chances are it’s time to inspect, repair, or swap out your filter.
7. Check Surfaces for Excess Moisture
Check surfaces like reflectors, buckets, basins, and reservoirs for excess moisture. This can be a sign of humidity and temperature issues, along with airflow and co2 issues.
Excess moisture in the wrong environment will lead to mold and is a breeding ground for harmful bacteria that will destroy your plants. When you see excess moisture, dry it completely.
8. Check the Height of Your Lights Above Your Plants
Make sure the height of your lights aren't too close or too far away from your plants. Note: Not all lights are created equally. HID's, LED's, and T5 Fluorescent grow lights all require different heights:
HID Grow Lights
- 400w HID Grow Lights: 12″-19″ away from plants.
- 600w HID Grow Lights: 14″-25″ away from plants.
- 1000w HID Grow Lights: 16-31″ away from plants.
LED Grow Lights
- 240-400w LED Grow Lights: 16-30” away from plants during vegging.
- 450-550w LED Grow Lights: 20-30” away from plants during vegging.
- 600-850w LED Grow Lights: 24-26 away from plants during vegging.
- 900w+ LED Grow Lights: 26-42” away from plants during vegging.
T5 Fluorescent Grow Lights
- Keep lights within 5-12” above plants.
- Measure canopy temps to assure you don’t burn or underwhelm leaves.
- Canopy temperatures should be the same at your ideal grow room temperature.
9. Check Absorption/Moisture Levels
For soil growers it’s a good idea to check the moisture level of your soil daily to make sure you’re feeding the plant when needed. stick your finger about ½” to 1 and make sure it’s dry or use a moisture meter. coco coir can be measured in the same way.
Hydroponic growers don’t need to measure moisture content, but it’s a good idea to make sure your plants are getting a good amount of water. water rolls right off of rockwool & pebbles which can leave plants dry, so make sure your plants aren’t starving for water. At the same time, make sure you’re not overwatering your plants and causing them nutrient lockout.
PRE-VEGGING STAGE
Now that you're prepared and have your genetics all lined up it's time to get started! But before you dive right in to the vegging stage you've got to get your seeds and/or clones ready to grow your future harvest, right? Right. Now let's get your grow started:
Starting Your Grow from Seeds and Clones
Now that you've got your seeds or clippings ready it's time to get them in to a medium and start them off to a healthy life. This stage is make-or-break and if you start your plants out on the wrong foot you'll be paying for it later. Make sure you start your plants off right to assure quality the moment you transplant them in to larger pots.
Starting with Seeds

Growing from seeds is the most natural way to start your garden, but it's also the trickiest. When seeds begin their life as a plant, their taproot comes out of the seed and "pops" the shell, allowing the root to dive down in to the medium for nutrition. You don't have to use special gels to get seeds to grow like you do with clones, but there are 3 main ways propagation can occur before the vegging stage:
- Popping seeds on paper towels- By popping your seeds on moist paper towels you'll know for sure you've got a taproot instead of playing the waiting game for a seedling to hopefully show up. Then you just plant those popped seeds in to the medium you choose and you're ready to grow.
-
Starting in cells (or cups)- Whether your seeds are popped or not, you can also consider starting your plants off in a starter cell or even plastic cups filled with soil or coco.
- Starter cells usually have everything you need to get those seeds growing in to seedlings with a medium that's perfect for root growth. With a humidity dome, you'll be able to propagate more than one seedling at a time.
- Plastic cups essentially work in the same way, only they have more room for root growth than starter cells, so you can potentially start your grow off with a larger plant. Be careful to not let plants get too big in plastic cups because they can become root bound, which isn't good for young plants.
- Starting in pot you’ll be using- When you don't want to pre-pop your seeds, you can always consider putting seeds directly in the plant pots you plan on using for the entire life of the plant. While this will take the hassle of transplanting out of the way, you run the risk of overwhelming your new plants with too much light and too much water. If you plant directly into a big pot, be sure to feed minimally and light them softly.
Starting with Clones

Growing from clones is a sure fire way to guarantee plant genetics. Seeds have the ability to grow a stronger plant than clones, but they're also a toss up.
Seeds can either be male or female and even if they are the sex you want you can't guarantee they have the strain's traits you're looking for. Clones, on the other hand, come directly from the plant its taken from.
If you're looking to replicate genetics to the tee, you'll want to start off with clones:
- With a sterilized scalpel, find a healthy fan leaf and cut it from its branch at a 90° angle.
- Once you take your clippings place them in water to prevent bubbles from entering the plant's stem.
- Use cloning gel on the clippings you took from their mother plants, insert the clones in to starter cells and cover them with a humidity dome.
- Standard starter cells are great for transplanting growing clones in to soil or coco.
- Rockwool starter cells are great for transplanting growing clones in to coco or hydroponic mediums.
- Keep them in that humid environment (72-77°F) for 1-2 weeks, and once they're the size you want they’re ready to transplant.
Transplanting Your Seedlings and Clones
Once your seedlings and clones are as big as you'd like them it's time to transplant them into their permanent pots. Keep in mind that plants don't like to jump around from bucket to bucket, so keep transplanting down to a minimum by learning what size pots you want your plants to end up in.
- Keep transplants to an absolute minimum. It should really only be around 1-2 transplants at most because any more than that and you risk severe plant damage.

Avoiding “transplant shock”- If you've ever taken a plant out of a container and put it in the ground or in another container, you'll notice at some point the plant begins to deform. Whether it becomes limp, shrivels up, slows growth, or halts growth altogether, what happens with the plant is a direct consequence of an extreme change in environment. That change: being uprooted.
Now don't worry, just because most plants suffer transplant shock doesn't mean your plant's going to die. All it means is that you've got to baby your plant until it's back in shape, which- depending on how much shock they've experienced- can be as quick as a couple of days. To avoid shocking your plants too much when transplanting...
- Don't mess with the roots- It's virtually impossible to avoid disturbing roots, but when transplanting don't simply dig in to the area around the plant, because you'll likely damage roots. Instead, try moving the entire amount of medium in to the new pot by turning the pot or cell over once the medium has compacted, then plant the entire thing in to the new medium.
- Don't disturb the root ball- That means not shaking off any soil or breaking off rockwool to keep your main root ball in tact.
- Give your plants plenty of water when you've transplanted- There's nothing that'll shock your plants even more than no water. For the most part these plants will be in recovery mode once they're out of the initial medium, so you'll want to make sure that when they want to eat they're able to do so. Moreover, make sure your rootball always stays moist, otherwise the roots in the dry area will become damaged. (Note: this does not mean overwater your plants, but watch them and make sure to feed them when needed)

Knowing when to transplant- Sure, we all know what transplanting's for, but do you know when to transplant your plants in to their forever pots? When plant height's not your go-to check for transplanting, here are a few tips on what to look for:
- Growing in starter cells: Feel around root zone: if loose and not a lot of roots, keep them in their starter cell; if it’s hardened and there are good roots it’s ready for transplant.
- Growing in rockwool cubes: Make the roots are as plentiful as you want them, but not so few that transplanting them would harm the plant. Rockwool's usually used in hydro or coco, which means too few roots would overload your plants with nutrients once you transplant them.
- Growing in soil: If you're growing in the largest pot you want to use, all you have to do is let the plant grow. However, if you're using soil in a plastic cup make sure your plants have rooted but aren't root bound, that your soil has hardened but isn't compact, tip over and plant the plant directly in to the bucket.
Prepping your medium- Before you get those plants in to the medium you've got to make sure it won't further shock your plants. Don't worry, this part's actually pretty easy:

- Soil- Prepping soil can be as easy as adding perlite and gently watering the soil you've purchased or as complicated as mixing elements together to create a super soil.
- Coco coir- Because coco husks are pH neutral you don't really need to prep the medium other than breaking it down. You'll find it in block form, so just soak it, break it up, and fill the bucket. After that you'll want to soak all of that medium in the nutrient solution of your choice.
- Hydroponics- Add a little seaweed extract or shock treatment to your medium before transplanting. Assure temp of water/nutrient solution is 68°F (room temp) so as to not shock the roots. After that load the water with your nutrient solution.
Prepping nutrients- Okay, so there's one last thing we need to go over before you put your young plants in their permanent homes, and that's how you mix nutrients in to your feeding solutions.

Again, don't worry- it's actually pretty simple. Still, it's important to prep your water and mix your nutrients properly before feeding them to your plants:
- Test the pH and PPM levels of your water to make sure it's healthy for them to use the water you want to use (5.5-6.0 pH, as close to 0 ppm as possible when starting off).
- If your water is hard or you feel it’s too loaded with trace elements you’ll want to run it through a reverse osmosis system to clean it.
- If you can’t use an RO system, let it sit out in the open air to make sure at least chlorine is taken out. Be sure to aerate your water by hand or with a pump to make sure there's enough oxygen in it to be beneficial to plants
- If your water is hard or you feel it’s too loaded with trace elements you’ll want to run it through a reverse osmosis system to clean it.
- Research your nutrients to make sure the manufacturer's recommended dosages are optimal for your plant.

- Most growers agree to use only half of the manufacturer's recommended dosage depending on their strength.
- First find the recommended dosage amount on the feeding chart that came with your nutrients.
- After that take the size of the reservoir (hydro) or water canteen (soil/coco) and determine how many mL of nutrients need to go in there.
- For example, if you have a 10 gallon (~38 liter) reservoir and your nutrients call for 5mL of a given nutrient per gallon, you're being asked to mix 50mL (~1.7oz) in to that reservoir.
- Now, if you need to split that strength in half, you're going to mix 25mL in to that reservoir.
- Most growers agree to use only half of the manufacturer's recommended dosage depending on their strength.
- Measure the pH of your new nutrient-rich water and make sure it’s at safe levels and at room temp before feeding.
GROW STAGE/ VEGGING CYCLE
You've hung all of your lights, you've calibrated and checked your nutrients, your clones and/or seedlings are ready to be transplanted. All there's left to do is get those plants in to their grow buckets and get them started, so let's get to it!
First up: the vegetative stage.
What is the vegetative stage of growth?

The vegetative (or "vegging") cycle of your plant's life is known as the "growth" stage because this is where the structure of your plant is formed.
From fan leaves to branches, root zones to future flowering sites, this is when your plants create the structures it needs to live, grow, and yield the harvest you're looking for. Essentially, there are three main things the vegging stage does:
- Creates root zone growth for total plant nutrition- Without lots of roots your plant can't get the nutrition it needs efficiently. Plants need lots of roots to absorb the elements they need out of their grow medium, from soil to hydroponics.
- Foliage growth to absorb light- Plants receive light and take in precious CO2 through their leaves. In order to eat, grow, and breathe your plant needs lots of leaves, and this is the stage where they'll grow them
- Stem and branch growth- In order for leaves and flowering sites to exist they need somewhere to grow, and that's going to be on branches. Not only will strong branches lead to more leaves and flowering sites, strong branches will also allow big buds to stay and grow on the plant as long as they need to before harvest
How to Transplant Seedlings and Clones
Now that you know what the vegging cycle is for it's time to get it started by transplanting those clones and seeds in to their larger buckets.

To start, check to make sure your plants and their cells are ready for transplanting:
- Starter Cells- If you’re using peet/perlite starter cells cells or soil in cups/cells, make sure the medium has hardened and has lots of roots - usually takes about 1-2 weeks.
- Rockwool- When you use rockwool cubes let the seedlings or clones produce lots of roots first. Make sure the rockwool is soaked throughout the day because it will dry out which is not good for roots- usually takes around 1-2 weeks.
- A note on lighting- Make sure your light isn’t going to overpower your plants. For example, if you’re growing with a 1000w light you may need the ability to dim it down so that you don’t overpower your plants.
Once you know your plants are ready for transplant, let's get to it!
Transplanting in to Hydro- A big advantage of transplanting in to hydroponics is that you don’t have to keep transplanting bigger and bigger buckets. In most hydro systems the DWC bucket they site in or the reservoir they grow in will hold your plants' roots. With hydro you pretty much just transplant in to its medium and you're ready to grow.
 A) Transplanting in to Pebbles (drip, ebb and flow, DWC)- Start by soaking pebbles for 8-24 hours prior to use with an air stone to assure they expand. Then measure out the size of basket you need to use and fill ¼ of the way with pebbles. After that insert your plant and fill the rest of the basket with pebbles.
- Rockwool cubes- If young plants are grown in rockwool cubes they can be planted directly in baskets with the pebbles.
- Circular/foam cells- If the roots are below the cell, simply cut the cell off and plant the plant directly in to the medium, still filling it ¼ of the way, planting, and filling the rest with pebbles.
- Starter cells- These be planted directly in to the pebbles as usual, but keep a watch on your water because all of that peet/perlite will wash off. Make sure it washes completely off the plant, off the pebbles, and get it out of your reservoir when you change your feedings
B) Transplanting in to loose medium (soil/ coco): Going from cell or rockwool in to soil or coco can be tricky, so make sure to be extra careful around plant roots and take care to avoid over-feeding your plants.

- Start by using 1-2 gallon pots (too big of pots and you can overwater your plants).
- Fill the pot about an inch below the tip and tap the medium to let it settle down a little more. This is to take out air pockets in your medium and essentially creates a “fill line” you don’t want to go over when watering.
- Once the medium is ready, dig a hole in it the size of your starter cell, rockwool cube, or the smaller pot you need to transplant.
- Plant your young plant in the medium, then cover its cell completely with soil/coco.
- Note: if you're using rockwool, cover the cube and expose only the top of the cube.
- Water the medium and get your plants under lights.
- Note: Soil has the tendency to take in water and leave rockwool cubes to dry. We recommend checking both your medium and your rockwool cube to make sure they’re both saturated as needed.

- Carve out a hole the size and shape of the rockwool you’re using in the newer, bigger rockwool cube or tray.
- Soak the cube in the recommended feeding strength at 5.5-6.0 pH water, then let the nutrient solution drain off.
- Insert the cube with the clone in the larger cube, making sure the roots are headed downward.
A note on using little to no supplemental nutrients in soil grown plants- It's been mentioned before, but it bares repeating now more than ever: if you’re using nutrient-rich soil you do not need to add more nutrients in to your feeding schedule just yet because everything your plant needs to veg is all there- and then some.
VEG: WEEK 1 (DAY 1-7)
Week 1 is a little different than the other weeks because depending if you’re starting from seedlings or clones will determine which nutrient mix you follow.
Soil
You’ll most likely water twice this week. Your first watering will be with your nutrient mix and your second watering will just be plain RO water at 6.8pH. With soil always feed every other watering.
Hydro

Watch your pH levels during your first week. They will begin to fluctuate acidity overtime. Since your plants are still young, the change won’t be drastic, but build the habit of measuring your pH every other day to maintain consistency.
Also, check your PPM levels. Maintain PPM between 200-250 for seedlings and 550-700 for early growth/clones for your first week.
Throughout the week, test the pH every day and top it off with fresh water (ideally with 0 ppm). Adjust your pH every other day to maintain levels.
Recommended Lighting Height: Your lights should be no more than 24 inches above the tallest plant and not any closer than 18 inches.
VEG: WEEK 2 (DAY 8-14)
| Ideal Temperature & Humidity | Light Cycle | Ideal PPM: 550-700 |
| 70-85°F (21-30°C) | 18 Hrs On/ 6 Hrs Off | Soil pH: 6.3-6.8 (Ideally 6.5) |
| 40-60% Humidity | of 24 Hrs On/ 0 Hrs Off | Hydro pH: 5.5-6.1 (Ideally 5.8) |
At this point, your plants are a little taller. Make sure you adjust your lights to maintain the 18-24 inches above the plant canopy.
Great job!
Soil

During week 2 you want to only provide a quarter (¼) strength of nutrients in your feeding schedule.
The reason for this is because the Fox Farm Ocean Forest Soil is amended with nutrients already and you don’t want to overfeed, causing nutrient burn.
As the nutrients in the soil naturally depletes, you will increase your dosage over the next several weeks until you can provide a full strength of nutrients.
*Note: some soils do not require supplemental nutrients until the flowering stage. If you're working with such a soil, simply use water with your soil.
Hydro
Time to drain and refill your reservoir for feeding. Get used to doing this each week because you're going to be doing so from here until harvest:
- Drain your reservoir
- Refill your reservoir with RO water
- Add nutrients
- Check PPM
- Check and Adjust pH
This is also the week you should start pruning and training your plants...
Pruning and Training Your Plants

Around day 10 you can consider pruning and training you plants. While you may not want to take many fan leaves off this early, there are definitely some long-term benefits to pruning and training your plants:
- Pruning your plants can create more foliage which means your plants will be able to capture more light, and more light's always a good thing when it comes to plant growth.
- Pruning plants can also help direct growth toward buds in the flowering stage.
- Training your plants can expose it more light to stimulate flower site growth.
- Training plants can maximize light coverage across your plant canopy for better, more even and controlled growth.
- Training plants can also help control plant height and shape to maximize space in a growing area.
And with that, let's get in to training your plants...
Topping & FIM'ing plants

Topping a plant stimulates more shoots and growth from the main shoot at the top of the plant by cutting off the top-most shoot.
- This will grow two new sets of leaves which will also have new shoots, thus more leaves and potential for more bud sites
- Topping your plant will train your plants to grow shorter than they would be, which may or many not be a good thing depending on how you want your plants to grow
FIM’ing a plant will help form more buds on your plants. By removing 2/3’s of the tallest growing shoot of a plant (the leaves, not the stem) you'll create 4x main sites when your plants start to flowering. More flowers means more potential for fruit!
- Be careful because if you cut too much it’ll only grow 2x bud sites.
- FIM'ing help grow a wider plant and keeps plants shorter than they would be
Low Stress Training (LST)
Lows Stress Training will help you get similar results to topping in terms of exposing your plant to more light than it would have before, thus more foliage to capture that light in order to give more energy for growing flowers.

- With light string, start tying the branches of the plant gently to the sides of the pots (you can drill in to plastic, but this works easiest with fabric pots)
- If your main stem can be bent and tied feel free to do so, otherwise the other branches that can be bent down will work just fine
- This will help your plant focus on growing stronger, more vigorous growth from the branches tied down instead of focusing its energy straight up to the main cola of the plant
- You can top with this technique for even more vigorous growth, but remember than when you take parts of the plant away it will take time for your plant to get back on track growing (you may want to consider one or the other)
Sea of Green

Ahh, Sea of Green. We'll all heard about big harvests by using this technique and it's absolutely true. Done the correct way, SOG your plants will create a large canopy for lights to help your plants grow big buds and lots of them.
Note: You'll want to have at least 4 plants if you want to SOG. However, be sure your plants aren't crowded in your growing space
- Start by LST your plants so your plants grow wide, not too tall- SOG is all about wide coverage.
- Lay trellis netting above plants to help them continue to spread and to help limit the height of the canopy.
- As your plants grow, make sure to put branches under each square of netting so that they continue to grow outward.
- While your plants grows make sure to “lollypop” prune your plants.
- Lollipopping is trimming your plants of new growth on the main branch and other vital branches supporting flowering sites (or potential flowering sites)
- This will need to be done well in to the flowering stage.
VEG: WEEK 3 (DAY 15-21)
| Ideal Temperature & Humidity | Light Cycle | Ideal PPM: 600-900 |
| 70-85°F (21-30°C) | 18 Hrs On/ 6 Hrs Off | Soil pH: 6.3-6.8 (Ideally 6.5) |
| 40-60% Humidity | of 24 Hrs On/ 0 Hrs Off | Hydro pH: 5.5-6.1 (Ideally 5.8) |
Soil
During week 3 you want to only provide a half (½) strength of nutrients in your feeding schedule if you're using Fox Farm Ocean Forest Soil or soils that aren't super soils.
Remember that as the nutrients in the soil naturally deplete, you will increase your dosage over the next several weeks until you can provide a full strength of nutrients.
Hydro

Time to drain and refill your reservoir!
- Drain your reservoir
- Refill your reservoir with RO water
- Add nutrients
- Check PPM
- Adjust pH
Nutrient Lock and Nutrient Issues
Week 3 of vegging seems as good a time as any to go over nutrient issues that you may encounter, specifically nutrient lock. If your plants have been growing just fine but have started wilting or browning at the tips, chances are you're experiencing nutrient lockout.

Nutrient Lockout
Overwatering will cause nutrient lock out. Lockout in hydroponic systems is usually due to mixing in too many nutrients (usually too strong of a dose for plants). In soil and coco mediums it's usually due to over watering. Correcting this can be as simple and flushing your plants and getting their nutrient feeding schedule slowly back on track
Nutrient Deficiencies
If your plants aren't browning but rather, yellowing and losing their color, chances are the soil or nutrients used do not contain elements those plants need. Correcting this can be as simple as giving them more of the nutrition they're missing.
Pest Control and Fungal Infections
If your plants start to brown, yellow, have holes, or burn marks but your nutrients and environment are stable, chances are you’re having a pest issue or a fungal infection. They may be difficult to spot, so be sure to keep a close eye on your plants and their physical traits.

- Pests are usually visible on the plant. Whether it's holes from them chomping to spider webs to trails in your leaves, if your plants are looking a little sick the first thing you want to do is inspect your plants.
- When you find them, the best way to get rid of them is to use natural pesticides.
- Natural soap and water help kill bugs chomping at your plants.
- Neem oil will help kill off and keep spider mites away from plants.
- Natural Predators (lady bugs, mantises, etc...) will help kill bugs without needing to rinse off plants.
- Fungal and bacteria infections can cause rotting of roots and eventually buds.
- If the plant is caught early enough with white mold, you can spray it off and keep it away with a water/milk/neem oil mix.
- If plant is caught early enough with a disease you can give vitamins to your plant so it can try to heal itself.
- If plant is too far along in an illness or infection you’ll need to get rid of the plant to prevent it from getting other plants sick.
More on Pruning
At this point you’ll want to think about pruning your plants, whether or not you’re training them.
Pruning helps strengthen stronger branches receiving lots of light by removing lower hanging or poor-performing growth to help redirect the energy received through leaves.
- Remember that leaves take in light so removing too much foliage will stunt growth because it can’t receive light the way it’s supposed to.
- Remember that when a plant is damaged your plant will do whatever it can to recover from an injury. Too much pruning can shock your plant and hinder growth because it’ll be spending energy recovering and not strengthening flower-producing branches.
A Note for Vegetable Growers
When growing vegetables it's important to keep an eye on the flowering stage. Usually around 3 weeks, or towards the pre-flowering stage, most plants will begin flowering. However, things like lettuce and carrots that flower tend to be unusable once it flowers. This is because the parts of the vegetable- like leaves, branches, and roots- we use begin to harden and change their composition slightly, changing the taste and texture of what we want to harvest.
If you're growing leafy greens and root vegetables, you'll want to check in around weeks 3-5 and harvest before they start to begin the flowering process.
VEG: WEEK 4 (DAY 22-28), Pre-Flowering
| Ideal Temperature & Humidity | Light Cycle | Ideal PPM: 600-900 |
| 70-85°F (21-30°C) | 18 Hrs On/ 6 Hrs Off | Soil pH: 6.3-6.8 (Ideally 6.5) |
| 40-60% Humidity | of 24 Hrs On/ 0 Hrs Off Last Day of Veg: 18-24 Hrs On/ 24 Hrs Off |
Hydro pH: 5.5-6.1 (Ideally 5.8) |
Signs You're Ready to Flower
By this time your plants should be ready to flower because this is around the time your plants will start showing their sex. For example...

- Male plants will start producing pollen and pollen sacs in between their nodes.
- Female plants will start growing white pistles to take in pollen and produce seeds.
- Asexual plants will begin growing pistles and developing pollen, and will pollenate themselves.
Flushing and Feeding for the Flowering Stage
By week 4, you'll can do a week-long flush if your plants' sexes are starting to show. This will prepare them for flowering nutrients.

- This flush is not 100% necessary, but some growers believe it's better to flush before introducing flowering nutrients to their plants.
If you do not want to flush, week 4 is the perfect time to start giving soil plants nutrients.
Hydro
Time to drain and refill your reservoir!
- Drain your reservoir
- Refill your reservoir with RO water
- Add nutrients if you don't want to flush; otherwise, use a reverse osmosis machine to clean your water
- Check PPM; if you're flushing, keep in mind you'll aim for 0-50 PPM
- Adjust pH
Taking Cuts for Cloning

Your best shot for a plant to grow the way it's supposed to be to take clippings from a vegging "mother" plant.
While it's possible to clone from a plant that's been flowering, those cuts will take a while to look like they should. There are different genes that are activated in the flowering stage than in the vegging stage.
For a full step-by-step guide to cloning, including all the tools you need to clone your favorite plants, click here.
24 Hour Rest Between Flower and Veg, and Light Leaks
On your last day of your vegetative cycle, you want to allow 24 hours of complete darkness, then a 12hr on/12hr off cycle.
Have you ever wondered why 12/12 light cycles trigger flowering? It's just a change in exposure to light- how can it possibly be that vital in growing? Turns out lighting times is a huge deal when it comes to vegging and flowering.
Plants have a gene called Phytochrome Far Red (PFR) that tells plants to continue to veg. Darkness changes those genes to Phytochrome Red, which is a non-active gene. When a plant is in more than 12 hours of darkness PFR's essentially "turn off" and allow your plants to start flowering.
- This can only happen when plants are in at least 12 hours of darkness, so to get a head start changing those PFR genes you’ll want to give your plants 24-36 hours of darkness before switching over to 12/12.
- Keep in mind that no light will hinder growth, so while it's important to go all-dark before entering the flowering stage, don't over do it. 36 hours is going to be the longest amount of time you let your plants go without light.

Now there are sometimes where a door can open or a light leak can come through holes in a grow tent. While this may not be a problem in the vegging stage, light leaks are detrimental to flowering.
- If light hits your plants while they’re in darkness, it will trigger those PFR’s to activate, which- over an extended period- will send your plants right back in to vegging.
- When light leaks occur, return to your vegging cycle then repeat putting your plants on a 24-36 lights-out rest period after 2-3 days.
So when it comes to lighting during your pre-flowering stage light as follows:
- Day 22-27: Light schedule - 18/6 off.
- Day 28: Light Schedule - 18/24 off.
While your light is on, do all required watering/feeding and maintenance as necessary.
When your lights go off, give your MH lamp a chance to cool down before switching your bulbs out to an HPS.
Then turn off your timer and allow your plants to be in the dark for a minimum of 24 hours.
This is the last week of the vegetative cycle. Pay attention to the tips this week to ensure a successful transition from vegging to flowering. Not doing it correctly can delay the flowering stage resulting in delayed harvest times.
FLOWERING STAGE/BLOOM CYCLE
All that growth your plants were doing was leading up to this: the flowering stage. At this stage in growth you'll see flowers emerge and buds swell before harvest. Flowering properly is vital, and doing it the wrong way can set you back anywhere between two days and up to a month, so be sure to pay attention to your plants and correct any problems right away.
What is the Flowering Stage?

The Flowering stage of growth ends the vegging/growth part of its life and will begin growing flowers that can eventually produce the buds we're looking for. As such, this is going to be a pretty vital stage in your plant's life:
- This stage is also necessary for plant propagation, as this is when pollen is released and received by flowers to produce seeds.
-
- Female plants- if left alone- will continue to grow their flowers and buds until harvest.
- Plants from the first through the third week of flowering will continue to stretch before they meet peak height. This is known as “Flower Stretch”.
- You'll notice that your lighting will also be at 12 hours on and 12 hours off. Remember: this is to assure your plants have enough darkness to keep PFR's from telling your plant to veg some more.
- Keep in mind that flowering temperatures need to be around 10 degrees lower than vegging temps, and your humidity will decrease as well.
Mixing Nutrients for Soil Plants
As we mentioned earlier, the flowering stage is when you'll start to mix nutrients in to your feeding schedule if you haven't already (i.e. soil plants).
- When you start mixing nutrients in to your soil, begin by using about ½ strength of what’s called for, and only add nutrients to water every 2-3 feedings.
- Hydro and coco mediums use nutrients right from the beginning, so continue to use nutrients as they've been used.
FLOWER: WEEK 1 (DAY 1-7)
| Ideal Temperature & Humidity | Light Cycle | Ideal PPM: 500-700 |
| 65-80°F (18-27°C) | 12 Hrs On | Soil pH: 6.3-6.8 (Ideally 6.5) |
| 40-50% Humidity | 12 Hrs Off | Hydro pH: 5.5-6.1 (Ideally 5.8) |
Welcome to week 1 of flowering!
You’ll notice the title for this page is reset to day 1 instead of day 29. This is because the vegging stage may take 1-2 weeks longer for certain plants.

If you’re using an HID grow light and haven’t switched to your HPS (high-pressure sodium) bulb yet, this is the week to do it.
Switch your lighting schedule to 12 on and 12 off. This will help your plant’s circadian rhythm to begin blooming.
Notice something different about the environment chart? During the flowering stage, you want to keep your growing space environment cooler with a dryer humidity.
Plant Maintenance
Trellis Netting - If you haven’t put yours up yet, now is a great time to hang it up if your plants are getting too tall.
As your plants begin their “stretching” process (which will continue to happen) during their 1st month of flowering, a trellis net will help your plants maintain an even canopy for even lighting distribution.

If one of your branches grow too tall, you can feed it through the trellis net to allow the other branches to reach the same height.
Soil
From this point on, your watering will become more and more frequent as your crop has gotten taller and your roots are larger! That means it has a higher capacity to feed.
Still, maintain intervals of feed and water to prevent nutrient lock/salt build up.
*Note: Unless you're using super soils, you're going to be using nutrients in all of your feedings from now on. 1/2 to full strength nutrients will be necessary.
Hydro
Time to drain and refill your reservoir
- Drain your reservoir
- Refill your reservoir with RO water
- Add nutrients
- Check PPM
- Adjust pH

Pruning and Trimming During the Flowering Stretch
We highly recommend pruning off small branches and leaves at the lower 1/3rd of each plant in your grow tent. This benefits plants in many ways but the 2 main reasons are:
- Breathability - Flowering crops will introduce more moisture into your grow tent environment. Cutting down foliage and allowing fan air to move more freely through your garden will prevent airborne diseases like powdery mildew, mold, and pests.
- Higher Yields - The top 2/3rds of your plants will receive the most light and this is where the majority of your higher quality buds and flowers will be produced.
The lower portion of your plants is too shaded from the leaves and branches above. They essentially take up energy from your plants to maintain these lower branches and leaves. If you were to remove them completely, your plants will redistribute its energy to the parts where it’s getting the most beneficial lighting.
FLOWER: WEEK 2 (DAY 8-14)
| Ideal Temperature & Humidity | Light Cycle | Ideal PPM: 550-750 |
| 65-80°F (18-27°C) | 12 Hrs On | Soil pH: 6.3-6.8 (Ideally 6.5) |
| 40-50% Humidity | 12 Hrs Off | Hydro pH: 5.5-6.1 (Ideally 5.8) |
This marks the halfway point of your grow cycle (for most of you)! At this point, this schedule should be second nature. Give yourself a small congratulatory “HOORAH!”
This is the final week to prune your plants.
Soil
From this point on, your watering will become more and more frequent as your crop has gotten taller and your roots are larger! That means it has a higher capacity to feed.
Still, maintain intervals of watering to prevent nutrient lock/salt build up.

Hydro
Time to drain and refill your reservoir.
- Drain your reservoir
- Refill your reservoir with RO water
- Add nutrients
- Check PPM
- Adjust pH
Maintain (Prune) the Level of Coverage You're Looking For
This is your last week to make any essential trimming and pruning maintenance before it begins to truly flower. Pruning and trimming is very stressful to plants so it's important to do this task before they begin utilizing 100% of their time producing flowers and buds.
Any mass pruning from this point can negatively impact your final harvest and yield quantity. So if you have a few more small branches or leaves, this is the time to finally cut them down. However, there are two caveats to this:
- Plants are going to focus on growth of flowers, so new growth toward the bottom of your plants should be trimmed to direct that energy to flowers.
- Look around your plant for yellowing leaves and/or broken/damage stems you can remove, as your plant will try to repair these damaged parts instead of flowers & fruit. Trim them and get rid of them.
You Should See Your Plants' Sex by Now. If Not, You've Got to "Reveg".
The sex of your plant should be fully present at this stage. Male or female, you should know what you're working with. If the sex still hasn’t showed up by week 2 of flowering you’ll need to reveg your plants by switching their light cycle back to 16/8 or 24/0.

Now, if you can see the sex of your plants, here are a few tips on what to do with your newly identified plants:
- If you want to breed plants, leave plants as is and the pollen sacs will burst open around wk 2 or 3 of flowering.
- If you want only female plants, get rid of all male plants ASAP because even the smallest bit of pollen is enough to stimulate seed growth in plants
- If you’re not sure what to do then separate males from females. When they are completely separated from each other, collect the pollen sacs off the male plants in a plastic bag or a glass jar and save them in the freezer (pollen can be saved for later use)
- When you're working with females, maintain their growth to harvest.
Pest Control
We cover it extensively before but it’s important to understand basic pest prevention, eradication, and regulation. Keep this list in mind during your current grow or future grows moving forward:

- Cleanliness- Sterilize your grow area, equipment, and make sure you wear an outfit that was not exposed to anything outside your grow area.
- Prevention- Neem Oil will prevent possible pest infestations from ever happening. It sterilizes pests like spider mites and other soft-bodied insects which prevents them from reproducing.
Especially since buds are going to start growing, you’ll want to be very meticulous about plant care. If you thought your plants were attractive to pests before, those scents and all of those flowers are going to attract pests from all over. Unlike pest control in the vegging stage, there are a couple of caveats when it comes to pest control while flowering:
- Preferably use natural predators, as they’ll help keep unwanted chemicals from entering your buds
- If you did use chemicals before, DO NOT use chemical sprays on pest infestations during the flowering stage
- Pesticides can leach in to buds and in to the medium you're using, which are impossible to rid from the plant once it's soaked in to buds or absorbed at the roots
FLOWER: WEEK 3 (DAY 15-21)
| Ideal Temperature & Humidity | Light Cycle | Ideal PPM: 600-800 |
| 65-80°F (18-27°C) | 12 Hrs On | Soil pH: 6.3-6.8 (Ideally 6.5) |
| 40-50% Humidity | 12 Hrs Off | Hydro pH: 5.5-6.1 (Ideally 5.8) |

If you haven’t noticed already, your plants may have stretched and grown significantly more in the past 3 weeks vs your first 4 weeks of the vegging cycle.
This is normal!
This is what’s known as the stretching period and it is temporary.
They will finish their stretching period soon and will start converting their energy to flower and swelling buds for the remainder of the grow cycle.
No need to worry so long as your grow room's not leaking any light. Just make sure to check your pH and PPM levels and you're good to go.
Soil
Maintain intervals of feeding and watering to prevent nutrient lock/salt build up.
Hydro
Time to drain and refill your reservoir.
- Drain your reservoir
- Refill your reservoir with RO water
- Add nutrients
- Check PPM
- Adjust pH
FLOWER: WEEK 4 (DAY 22-28)
| Ideal Temperature & Humidity | Light Cycle | Ideal PPM: 600-800 |
| 65-80°F (18-27°C) | 12 Hrs On | Soil pH: 6.3-6.8 (Ideally 6.5) |
| 40-50% Humidity | 12 Hrs Off | Hydro pH: 5.5-6.1 (Ideally 5.8) |
At this point, you’ll start seeing flowers plump up and aromas will start to become stronger and stronger.
You notice the cluster of white salt rocks in the soil? That’s a concentration of unused nutrients messing with your plants.
You’re roughly half way through your flowering cycle and this week, it’s a good time to flush.
What is flushing and why should it be done this close to harvest?
It’s a technique that allows you to purge your current medium of any extreme nutrient/salt build up and provide your plants with a fresh balance of nutrients and water. These salts can fluctuate your pH, your PPM and cause adverse effects to your grow.
Hydro: Flushing will help clean your plant buckets/pots, dissolve salts in the medium, reservoirs, tubes, and pumps. To do this, simply drain the system of all nutrient-rich water and replace it with RO'd water.
Soil: Flushing will help dissolve salt build up in your pot and within the soil. To do this, simply start giving your plant pH'd RO water instead of nutrient-rich water.
We recommend flushing at the beginning of the week to decrease build up for the remainder of the grow cycle. It’s only a 24-hour process. Once you flush for a whole day, you can go back to your regular schedule feeding schedule.
FLOWER: WEEK 5 (DAY 29-35) & WEEK 6 (DAY 36-42)
| Ideal Temperature & Humidity | Light Cycle | Ideal PPM: 600-800 |
| 65-80°F (18-27°C) | 12 Hrs On | Soil pH: 6.3-6.8 (Ideally 6.5) |
| 40-50% Humidity | 12 Hrs Off | Hydro pH: 5.5-6.1 (Ideally 5.8) |

From week 9 - 11 of growth (flowering week 5-8), all you need to do is maintain feedings and a clean environment.
These are full bloom weeks so watch your plants fatten up and maintain your pruning and reservoirs (hydro)/ soil until the final week.
Week 5 will give you'll see your flowers will start to change color and fruit will start to swell up.
Week 6 will be further growth of flowers and swelling of fruit.
If there is new growth or growth dying off, be sure to prune it to assure plants are focused on growing your harvest.
FLOWER: WEEK 7 (DAY 43-49)
| Ideal Temperature & Humidity | Light Cycle | PPM: 400-700 (0-50 for flushing) |
| 65-80°F (18-27°C) | 12 Hrs On | Soil pH: 6.3-6.8 (Ideally 6.5) |
| 40-50% Humidity | 12 Hrs Off | Hydro pH: 5.5-6.1 (Ideally 5.8) |

If you’re growing crops like tomatoes, this is the week where you do not follow the nutrient feed schedule because we'll be giving your plants nothing but fresh water until it's time to harvest
2nd and Final Flush for 2 Weeks
“Near 0 ppm for 2 weeks. Why?”
As your plants begin to ripen and mature, they produce a lot of stored energy in the form of sugars within their leaves. You want the plants to begin cannibalizing itself to reduce chemical nutrients in the final crop. This method impacts the quality of taste, smell, and overall quality of your crop.
This flush is going to help in two ways:
- Helping your plants absorb any remaining nutrients it has stored in itself
- Try to help flush out anything it could have taken up through roots
- Note: any toxins or pesticides taken in by your plants will not easily get out of your plants (they probably can’t get rid of them, which makes it difficult to use/work with)
This is When Fruit Will Ripen and Pedals Start to Wither
From this week and on, you’ll notice two things: ripening buds and color change in your leaves. They will turn yellow and die off while the flowers/bud sites get fatter and begin to swell.
Don't worry, this process is completely normal.
This is a sign of nitrogen deficiency. Still, this is okay because nitrogen can hinder bud production and growth (that’s why there are low amounts of it in “bloom/flowering” nutrients)
FLOWER: WEEK 8 (DAY 50-56)
| Ideal Temperature & Humidity | Light Cycle | Ideal PPM: 0-50 |
| 65-80°F (18-27°C) | 12 Hrs On | Soil pH: 6.3-6.8 (Ideally 6.5) |
| 40-50% Humidity | 12 Hrs Off | Hydro pH: 5.5-6.1 (Ideally 5.8) |
You did it: you’ve made it to the last week of the flowering cycle.
Great job! Most plants are finished flowering by now, which means it's time to start looking in to harvesting your plants soon.
(Note: Remember when we said all plants are different and that they may need longer flowering times? Be sure to check out your seeds or research how long your plant takes to flower, because harvest times can vary from 8 weeks to 12 weeks or more. If your plants aren't ready to harvest make sure to keep them growing)

At this point, you’re definitely flushing the remainder of the nutrients from your plants and getting ready for your next grow or enjoy the fruits of your labor (pun intended).
Harvesting herbs is a little trickier than harvesting fruit and vegetables, so we'll go over what you need to know to harvest produce that turns to fruit:
Harvest Window
Most plants have a harvest window: let lettuce go for too long and it'll bolt up and become inedible, let the fruit sit too long on the branch and it'll over-ripen and spoil.
That's why you'll want to make sure you harvest your plants correctly. That's means doing it the right way and at the right time.
- Ornamental flowers, your want to harvest them at their peak vibrancy, smell, and size.
- If you're growing vegetables, make sure to research peak conditions as to when you should harvest the usable parts of your plant. Letting vegetables get too big will force them to flower and produce seeds.
- When growing fruiting plants, research sign, texture, and color of fruit at peak conditions. Over right fruit will rock, fall off of your plant, and can even lead to fungus and disease if left unchecked.
In most cases, you have 1-2 weeks to harvest your plants before you they over-ripen and die off. This time is vital because you don't want all of that hard work to go to waste, and missing your harvest window will do just that.
What to do When Your Yield isn't Where You Want Them to Be
Let's face it: sometimes your yield just isn't ready when you thought it would be by the time you anticipated. When that's the case there can be a few issues going on:
-
Strain- Some plants take longer to flower than others. Most flower for only 8 weeks, but some plants can take up to 10 or 12 weeks.
- Solution: Research how long it takes to flower your plants, and if 8 weeks is not enough feed your plants with their blooming solution until a week from harvest, then flush when necessary.
-
Light leaks around your garden- If you turn your lights off and you can see light seeping in from outside of the tent, you could need to give your plant some more growth time and darkness to compensate.
- Heat/light stress- if temps and conditions get too hot, your lights are too close to your plants (HID or LED) it will hinder harvesting (chances are your plants will start to create more growth, which is what you don’t want.
Harvesting Your Plants
When your plants are finally ripe and ready to harvest be sure to cut them down and start drying them.
- First start by chopping your plants down, either branch-by-branch or cut the whole plant.
- Remove excess fan leaves from branches.
- After you've cut them down it's good to dry your produce.
- Note: Some produce is ready to eat and use right off of the plant. If your harvest doesn't require drying, then rinse off your produce and dig in!

- Now if you need to dry your harvest, it's best to keep room/drying area at around 70°F (21°C) and 50% humidity.
- You can use a drying rack to dry them, just make sure that buds aren’t sticking to branches or to each other because that can cause mold if fruits and flowers can’t breathe.
- Most use clothes pins/hangers to hang dry buds.
- Be sure to hang plants upside down.
- Continue to dry for 3-7 days until they feel dry to the touch (small stems should snap off w/o stringy tail).
- Once they’re ready it’s time to cure.
Curing harvested fruit, flowers, herbs and vegetables is just as important to the quality of your harvest as feeding, lighting, and growing them correctly. We can't tell you how many growers have ruined an entire harvest because they cured their harvest incorrectly.

- Note: DO NOT CURE UNTIL YOUR HARVEST IS DRY! Moisture will cause mold on your new produce.
- Keep room/drying area at around 70°F and 60-65% humidity
- Curing helps your plants retain a little water (too little moisture will cause for harsh consumption and a lack of terpenes)
- Curing helps break down chlorophyll via helpful bacteria
- For dry herbs, use wide-mouthed glass major jars (quart/32oz)- too big may cause mold, not big enough and they won’t breathe
- Fill 75% full w/ air to breathe
- Once a day for a few weeks open the jar and let then breathe for 1-4 hours depending on how moisture they retain
- If your yield feels wet, leave them out for another day or so to keep drying
- If they feel moist but not super wet, open jars for an hour or longer and let them breathe for a bit
- If they feel dry you’re in a good spot
- If they feel brittle add a hydration pack to keep moisture levels up
- For a full rundown on how to properly dry and cure plants, head over to our blog on drying and curing your harvest here.
Now that you know how to grow your own, you can take clones or pop seeds in tandem with your grow so you're harvesting all year round!
Still, have questions? We know there are tons to go over here, so if you have any questions about growing plants indoors leave us a comment below
11 comments
Budlover
Quite comprehensive and informative, thank you for sharing your knowledge 👍 Cheers🤛
Fern
I just wanna say Thank you so much, this has been so helpful to me, as a first time grower. And I think My first crop is gonna be nice!
Mickey Bednarek
I really appreciate your concise tutorial. I’ve successfully grown my first batch but I can see the need to pay more attention to my babies. I have problems with light leaks and uncontrollable temperature. But I’m stoked and can’t wait to fire up one of my sticky buds.
M CoTodo
Consulted this throughout my whole growing process, thank you for the knowledge.
Renuvo
“I dugg some of you post as I cogitated they were very useful
handy.”
Jordan Flint
“Great material,very insightful and I have used almost every tip in this read and I’ll tell you what I’ve noticed a substantial difference in the quality and quantity of my harvest compared to prior seasons!!!
Thanks keep it up!”
amanda
Excellent how-to. Lucid and thorough, without useless chatter. Clear close-ups to demonstrate his point. One of the best how-to posts I’ve seen.
Devin Martinez
“Trimming fan leaves, new growth, and not essential leaves definitely helps your plants get more light to bud sites, but trimming at the wrong time (like deep into the flowering stage) or over-trimming will redirect energy that should be used to grow buds and focus it on trying to regrow leaves plants need to capture light. That said, those leaves curling around your buds should be trimmed.
You could also not be giving your plants enough light or the right nutrients. We all know plants need light to grow, but if you’ve got a big plant and you’re running a 400w light, your buds aren’t going to grow as big as they could.
Same with nutrition: if you don’t give plants the right nutrition they won’t grow the way they should, resulting in scrawny plants and small harvests. Moreover, if you want to push the limits of your harvests you could use additives and boosters to your feeding schedule. Just be careful because you could overfeed them and log them down."
Robert creamer
Thanks, that was great. I learned a lot from this!
Kiren
WOW!!! THIS IS CRAZY CONVENIENT. We just legalized out here in OK and let me tell you this is great to read and has so any insiders that will help me once i get this going. Cool Beans man keep it up
CRAIG Malone
What about trimming ? I cut down my whole plant, removed large fan leaves, but my buds are small and very soft. so do I keep the small leaves that curl around the bud ?