
Raise your hand if you want to grow your favorite plants but don't have a big garden. Okay, keep your hand up if you don't have room in your house for a grow tent. Is your hand still up? Good. That means you’re ready to grow but don't have many options.
Thankfully, there are solutions to growing your own fruits and veggies and getting the yields you want. In fact, if you can't grow outside and getting a grow tent is out of the question, converting a room in your home into a grow room is the perfect solution.
All you have to do is know where to start — and that‘s where this guide comes in handy. Here we'll build the foundation of your next grow room step by step. Whether you want to go all out or just get the basics to grow, we'll point you in the right direction and get you growing in your bedroom, closet, basement, and nearly anywhere else in your home.
Table of Contents
-
What Makes a Good Grow Room?
-
Preparing Your Growing Area
- Setting Up Your New Grow Room
- Turn a Regular Room Into Your Very Own Grow Room
So, let's look at how to build your own indoor grow room.
What Makes a Good Grow Room?

Not all rooms in a home are good for using as a grow room. Some have little to no airflow. Some are too small or too short. Others are unable to have total darkness.
The last thing you need is for your grow to suffer just because of the room you put it in, so it's vital to choose the right environment for your plants to grow in.
If you're thinking about making your room or closet suitable for growing, here's a checklist of attributes a room should have to optimize growth:
- Access to Sufficient Electricity — Your grow lights and ventilation equipment need to run for at least 12 to 18 hours each day on average, which means you'll be using a lot of energy. It's important to make sure that the room you're using has a breaker that can handle all the electricity your growing equipment is going to need.
- Access to Windows and Plenty of Airflow — Air exchange and environmental control (like temperatures and humidity levels) are vital to any grow room. You'll need to make sure the room you select has sufficient access to fresh air. Windows are great for letting in fresh air, as well as expelling stale air your plants will suffer from. Without windows, not-so-fresh air could potentially circulate throughout your grow, so it's important to make sure your grow room has access to plenty of fresh air.
- At Least 5ft to 8ft High Ceilings — If your ceilings are under 5ft tall, you'll risk damaging your plants from heat burn or bleaching, so you'll need to limit their growth. With an 8ft tall ceiling, you could let nearly any plant grow as tall as it needs to without hindering its growth. That said, even at 5ft, you can still grow a 4ft plant with plenty of room between the plant and the light. Anything less than 5ft, though, and you’ll probably harm your plants or your harvest.
- Choose a Room That Doesn't Receive Lots of Sunlight — Using a room that receives too much sunlight (and subsequently heat) can throw your grow room's environment off. It will force your fans and filters to work harder to cool your growing area, increasing your power usage and electricity costs. Worse, by having your equipment work harder, you could be putting more strain on each component, causing them to burn out faster and stop functioning.
-
Avoid Carpeted Floors — Whether you're growing hydroponically or with soil, spills are unavoidable. The last thing you want are for those spills to sit and create mold spores that can get into your grow room. When growing, avoid using a room with carpet.
- Note: If you're using a room above the ground floor, you may want to avoid hydroponics. If a pump goes out or something happens to your reservoir, it can — and usually will — drip down to the rooms below. However, if you want the same effect of direct nutrition without soil, you can always grow with coco coir.
- Use a Room in a Low Traffic Area — To avoid light leaks and imbalances, use a room that doesn't have a lot of traffic. You don't want anyone accidentally giving your plants light when they're supposed to be in darkness, so use a space that most people don’t enter.
While realistically you may not be able to meet all of these expectations, we should emphasize the importance of electrical availability — especially if you can't check off many of these boxes. Let's take a moment to go over voltage, wattage, and amperage as they relate to your grow room equipment.
Electricity in Your Grow Room
Ever plugged too many things into an electrical outlet and threw the breaker? Most household equipment has fairly low wattages, but when it all functions together it can be too much for the breaker to handle.
 The same thing will happen with grow lights and equipment. Depending on the energy it takes to power your equipment, you'll need to know how much each room will be able to handle. To do that, we've got to take a look at voltage, wattage, and amperage.
Voltage
Voltage is what powers the circuit in the breakers connected to your power outlet. In most homes, the voltage of each circuit is either 120v or 240v.
Amperage
Each 120/240v circuit helps power a breaker. That breaker has an amperage limit, which is usually 15 amps or 20 amps. Every piece of equipment you'll run has an amperage and wattage cost, so you'll need to make sure you don't overload your circuits with too many amps and/or watts.
Wattage (Watts)
Wattage refers to the amount of power a piece of equipment will use. For example, a 1000w grow light will draw 1000 watts of power to operate.
There's a limit on how many watts a circuit can handle, which means there's only so much electricity you can ask a breaker to put out before it shuts down. To figure out the limit of your breakers, all you have to do is multiply the amperage level of your circuit by its voltage. For example:
120 Volts x 15 Amps = 1800 Watt Limit
120 Volts x 20 Amps = 2400 Watt Limit
240 Volts x 15 Amps = 3600 Watt Limit
240 Volts x 20 Amps = 4800 Watt Limit
Now, you don't want to try to reach this limit when you're growing. If you're going to be using equipment for more than a few hours at a time (which you will when growing), you'll want to reduce your wattage limit by 20 percent. As such, you’ll want to keep these wattage limits in mind:
1800 Watt Limit = 1440 Watt Limit
2400 Watt Limit = 1920 Watt Limit
3600 Watt Limit = 2880 Watt Limit
4800 Watt Limit = 3840 Watt Limit
So how do you know if you'll be overloading your breakers? It's actually pretty easy. All you have to do is add up to the total wattages and amperages. Let's put this into practice:
For example, say you're working with a 120v 15amp breaker, and you want to use the Yield Lab 600W HPS+MH Air Cool Tube Reflector Digital Grow Light Kit:
- This kit uses 600w of power and 5.5 amps at 120v.
You'll also need to use at least one 6-Inch 440 CFM High Output Fan to cool your growing area.
- That fan uses 170w of power and 1.4 amps at 120v.
With this setup you'll be using 770w of power at 6.9 amps. That's well within the 15 amp 1440w limit we want for our grow room.
The more equipment you need — if you're running hydroponic equipment and supplemental lights, for example — the more amps and wattage they'll use. Make sure you know the limits of your grow room's electricity and what you need for your plants.
Preparing Your Growing Area
So you know how many plants you want to grow, the space you want to grow in, and how to keep your breakers from tripping. Now it's time we start getting the equipment you need for your grow room.
No matter what style of growing you plan on doing, or how complex you want your grow to be, we'll walk you through the ins and outs of what you need to get growing.
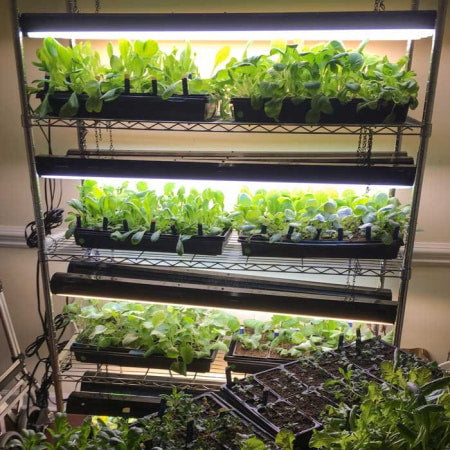
1. Grow Lights
Any good grower will tell you that after genetics, your grow lights are the most crucial part of your grow. Without the proper light, your plants can end up giving you weak harvests. But how are you supposed to know which grow light to work with?
You have lots of choices out there, so the key to finding the best light for your grow room is focusing on the coverage area, strength, and intensity of a light:

HID grow lights (HPS/MH/CMH lights) are great for nearly any grow room. They’ll give your plants the lumens and PAR they need, while also giving them the wavelengths of light needed to grow. They also have the added bonus of providing some extra warmth to your grow room so your plants don't get too cold while they're trying to grow.
The downside to HID lights is that they give off so much heat that your plants will suffer if your grow room isn’t ventilated properly. When your grow room's environment is too hot, it will hinder your plant's ability to grow. Worse, if your plants are too close to those hot lights your garden will become a fire hazard.
Solution: Make sure you have plenty of ceiling height to ensure your plants don't hit these hot lights. Be sure to also maintain constant airflow and a temperature of 65 to 75°F.
- Closets can handle 400w HPS/MH grow lights and 315w CMH grow lights and will give you plenty of lumens for a plant or two.
- Bedrooms can use 600w HPS/MH grow lights and get great results for three to four plants.
- Large rooms and basements can utilize 1000w HPS/MH grow lights as well as double ended 600w and 1000w HPS/MH grow lights for huge results.
- The larger the space, the more lights you’ll need. Keep this in mind when powering a large growing area.
LED grow lights are perfect for all grow rooms. From a closet with one to two plants to bedrooms and basements with large grows, the right LED grow lights will give you all the light your plants need at nearly 50 percent of the energy HIDs use. LEDs come in all sorts of shapes, sizes, and wavelengths — some even come with extras like ultraviolet bulbs. They don't generate heat, either, so there's virtually no overheating with LEDs.

There are two things that make growing with LEDs tricky: intensity and price. Most LEDs are pretty intense. Unlike HIDs that need around 15 to 18 inches of height above plants, LEDs can need up to 24 inches of space between plants to avoid bleaching. Moreover, while they save you money in the long run, the upfront cost of LEDs can be higher than HIDs.
Solution: Ensure you have the height it will take to use a high-powered LED effectively in your grow room. You should have at least 20 inches of room between the top of your plants and the light.
-
Closet grows can use up to 270w LEDs and get all the light needed for fantastic results.
- You could use a 360w light if you’re up for the challenge, and with some close attention, you can get some killer harvests. Just make sure you have the space, because crowded plants that are too close to a strong light will suffer.
- Bedrooms are great for 450w and 540w LED grow lights that can cover 4ft x 4ft and 5ft x 5ft spaces with plenty of strength for your plants.
-
Large rooms and basements need 720w, 810w, and 900w LEDs in order to grow all of the plants you plan on bringing to harvest. These high-powered lights are often more intense than their HID counterparts, so while they can give you a huge boost in size and flavor, they can bleach your plants if they’re too close.
- Big rooms and basements may require multiple lights. Make sure you have enough ceiling height to keep a good distance between yourself and your plants.
T5 grow lights are great because they tend to give you a big coverage area without the intensity of LEDs and the heat of HIDs. That means with one light you can cover two to four feet of space — so whether you're trying to grow clones or flowering plants to harvest, you'll be able to give multiple plants sufficient light with just one single grow light. They also run a lot cooler than other lights, so you'll be able to save money on electric bills while keeping your grow safe.
 While T5 grow lights are safer, they're unfortunately less effective than their HID and LED counterparts. Their construction allows for much softer light than others, but that soft light doesn't have lots of PAR behind it, so T5 lights need to be hung closer. That usually results in smaller yields.
Solution: Though smaller yields are unavoidable with T5 grow lights, training your plants to grow outward and exposing their branches helps maximize light penetration. Keep them within 10 inches of the canopy and you'll be good to go.
- Closets can utilize 1-bulb to 4-bulb 24w T5 grow lights for smaller plants, and 1-bulb to 2-bulb 54w T5s for larger plants. These T5s are great for growing clones, seedlings, and smaller plants in closets. The lights needed to grow fruiting plants, however, are usually too big to fit in closets.
-
Bedrooms, large rooms, and basements will need to use 8-bulb to 12-bulb 54w T5 grow lights to help fruiting plants reach their full cycle. These usually measure around 4ft x 4ft or larger and are meant for larger areas.
- You may need to use multiple lights to get the coverage and power you’re after. If that’s the case, keep in mind how large your growing area is because these T5s take up lots of room.
2. Mediums and Growing Equipment
The medium and equipment you use in your grow room are just as important as the lights. There are advantages and disadvantages to each type, so let’s go over your plants’ options.

The great thing about growing plants in soil is that it’s low cost, easy to use, and the most forgiving on growers. All you need is the soil, some perlite to aerate it, nutrients, and water. Most soil already has nutrition in it, so all you have to do is mix up your soil and perlite. When you water your plants, those nutrients will be released.
Unlike soilless systems that give your plants direct nutrients (which can lead to spikes in nutrition), soil slowly releases nutrition for steady nutrient absorption. It’s relatively simple to use and gives you a lot more room for error than soilless systems.
The slow and steady nutrient delivery of soil can be its downfall, though. If your plants experience nutrient lockout or other nutrient deficiencies, it will take a while for them to heal from these issues. You’ll need to flush your plants before adding more nutrients back into your soil. That can prolong harvest times exponentially.
Necessary accessories for soil-grown plants include:
-
Growing pots, preferably fabric pots that allow for air pruning of roots.
- 1 to 3-gallon pots are great for smaller plants such as cilantro or small peppers and for starting out clones/seedlings through the vegging stage.
- 5 to 7-gallon pots are great for mid-size fruiting plants (up to 4ft tall) such as tomatoes and cucumbers through harvest.
- 10-gallon pots and larger are made for large trees. Unless you’re planning on eventually moving plants outdoors, you probably won’t be using these.
-
Drainage trays for your pots. Without trays, the water you give your plants will drain onto your floor, and that’s never a good idea.
- Depending on the size of your plants, you may also want to consider a syphoning system of some kind. Normally, you lift your plants, dump the tray out, and move on, but the larger and heavier your plant is, the harder that will be. In those cases, you’ll want to use a syphon to get rid of excess water. You don’t want your plants sitting in water that can cause problems like root rot and nutrient lockouts.
- Nutrients for your plants. You won’t need too many nutrients depending on the soil you have, but eventually all soil loses most of its nutrition. Make sure to have nutrients on hand for when your plants need more nutrition.
There isn’t one specific way to grow hydroponically. This is great for anyone looking to use hydroponics because there’s usually something for everyone.
Hydroponics produce faster and larger yields than soil-grown plants, hands down. That’s because instead of roots having to find nutrients that are released by soil, roots receive nutrient-rich water the moment they start growing. By receiving nutrients faster and in higher amounts, your plants have the chance to grow faster and bigger than ever. With that amount of growth comes a lot of work, though, which makes hydroponics tricky when it comes to growing.

The maintenance with hydroponics is pretty intense. Soil buffers a lot of nutrient issues, but hydroponics holds nothing back. If your feedings are off — whether it’s pH levels, PPM levels, or gaps/spikes in nutrition — your plants will feel it right away. If you don’t act quickly, plant issues in a hydroponic system can go from minor to major quickly. Not to mention they’re entirely powered by electricity, so an electrical failure can bring a hydroponic grow room to a grinding halt.
There are three main types of hydroponic systems you’ll be able to choose from:
- Drip Systems — These systems give plants’ roots a steady stream of water that gives them all the water and nutrition they need. They do this through small drippers attached to the pots your plants are growing in, so it’s important to monitor these drippers and keep them clear of clogs that can prevent water flow.
- Deep Water Culture (DWC) Systems — In these systems, your plants sit in a tub of nutrient-rich water and soak in nutrients. A bubbler pumps bubbles into your water so your plants’ roots receive oxygen, because without oxygen, plant roots would drown. If you go with a DWC, make sure you maintain your pumps so they’re always giving your plants the nutrients they need.
- Ebb and Flow Systems — With these systems, you can quickly give a lot of plants the water they need. Plants are given a flood of water that covers their entire root bed with nutrient-rich water. After about 5 to 15 minutes, the water goes back into the reservoir and your plants are given oxygen. Your plants are then given another flood after a short while, and the cycle repeats. It’s vital that you check in on all elements of your system, as one bad move can severely harm your plants.
Most hydroponic systems have all the necessary equipment included. All you’ll need are nutrients and the right medium.

While nutrition is pretty universal, finding the right medium depends on the type of hydroponic growing you want to do:
- Coco coir is the most versatile medium in hydroponics. It retains a lot of water, so you don’t have to keep as close of an eye on it like other forms of hydroponics. In the event of an electrical short, you’ll be able to recover without worrying about much damage to your plants.
- Rockwool is made of fibers that allow roots to find their own networks while taking in nutrients it’s given. Rockwool keeps a lot of water soaked in, though it dries faster than coco coir, so it’s important to keep rockwool moist often.
- Pebbles allow your plant roots to grow without retaining any water. With pebbles, plants take in what they need and drain off anything they don’t. Because they retain no water, you need to provide plants grown with pebbles a constant flow of water — otherwise your plants can starve quickly.
Whether you’re growing with soil or hydroponics, we recommend that you purchase a floor tray to place under your plants. In the event of spills or leaks, you don’t want to have anything drip onto the floor of your room. Not only can that lead to mold if it’s untreated, but you also risk water running out of the room, or worse, onto electrical outlets.
3. Ventilation Equipment
Your grow room needs plenty of fresh air in order for your plants to grow. Fresh air keeps your plants’ stomata open so they can breathe while helping maintain optimal grow room conditions.

Like lights and medium, airflow can make the difference between a weak harvest and a successful one. To make this happen in your home grow room, you’ll need to make sure you’ve got the following:
-
High Output Fans — These fans will help bring fresh air into and push stale air out of your room. This will be the bulk of the air that comes into your grow room, so you’ll need to make sure you have the right fan for your grow room.
- Oscillating Fans — Whether you have traditional stand fans or smaller clip-on fans, you’ll need fans to move the air that your high output fans bring in around your plants. This helps with both strengthening your plants and circulating fresh air.
- Carbon Filter — These filters help scrub the air your high output fans bring in, ensuring that the air your plants breathe is free of stoma-clogging particles.
- Window Vents — These block off the rest of your window to help control the air that comes in and out of said window.
Note: High output fans and filters will have a “CFM” number on them — that stands for cubic feet per minute. It’s important to know, because if you’re not sure what size to get, you could be giving your plants too little or too much air.
Without the proper temperatures and fresh air exchanges, your plants are going to suffer. Let’s take a quick moment to figure out how to find the right high output fan and filter for your room. Thankfully, it’s pretty simple:
- Multiply the cubic area of your grow room (LxWxH) by the number of air exchanges you want every hour — we recommend 15 to 30 exchanges in an hour, or once every two to four minutes — and divide it by 60 minutes.
Let’s put this into action. We’ll use an example of a bedroom that’s 6ft (L) x 5ft (W) x 6ft (H):
6 x 5 x 6 = 180 cubic feet
180 x 30 air exchanges = 5400
5400 / 60 minutes = 90 CFM needed for that grow room
Pretty low, right? Keep in mind that air exchange (i.e., making sure there’s fresh air in your grow room at all times) is just one part of the ventilation equation. You also have to take into account the heat from your grow lights and the humidity coming from your plants and their growing environment.
Everything considered, you could go with something like the Yield Lab 4in 190 CFM fan for a basic grow room. That said, if you’re growing a large number of plants with HIDs, you may want to consider something like a 6in 440 CFM fan (and filter) instead.
In case high output fans are too much for your room (say, in a closet), make sure to use a speed controller to regulate the amount of air coming into/leaving your growing area. Oscillating fans will move air around, but you’ll need to exchange that air every two to four minutes, which you’ll need a high output fan for.
4. Pest Control

If you thought your house had a bug problem before, just wait until you introduce plants into your room. You can’t imagine the amount and types of pests that show up when they smell your grow room, so it’s best to be prepared for them. There’s a three prong approach to pest control in your grow room, so make sure you have at least two of these three in your grow room:
- Sticky traps help capture flying and crawling pests before they can do damage to your plants. Have at least one to two traps per plant to ensure you get as many of those pests as possible.
- Neem oil (which is mixed with water) will help you kill off pest infestations when they occur. This is safe to use on plants and will not harm their medium when used properly.
- Natural predators like ladybugs and praying mantises will eat pests like spider mites and aphids. In doing so they protect your plants from becoming a pest buffet. Be aware that those predators are insects themselves, so you’ll need to figure out which is best for your plants and how to get rid of them when you don’t need them.
Don’t forget that your grow room is also susceptible to regular pests you can find in your home and garden. Roach and ant traps are vital, along with mesh filters on any ducting pointing outside. The last thing you want are household and outdoor pests having access to your grow room, the food you're growing, equipment, and worse, your entire home.
5. Hygrometers/Controllers
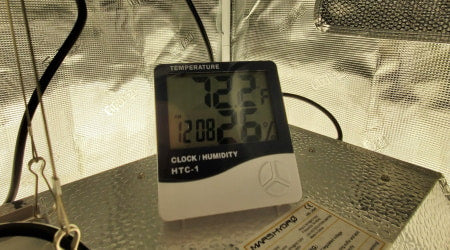
A hygrometer measures the temperature and relative humidity in your grow room to maintain the perfect growing environment. Without the right environment, your plants can’t grow, so it’s important to keep an eye on temperatures and humidity levels. With a hygrometer you’ll be able to read both to adjust the environment accordingly.
The type of hygrometer you choose is up to you. Some are just like thermometers, while others can read the environment and control your ventilation equipment to level out temps, humidity, and even CO2 levels.
- Simple hygrometers like the Yield Lab Digital Thermo-Hygrometer will tell you the temperature and humidity level of your grow room.
- Hygrometers like the LTL Day/Night Fan Speed Controller tell you the temperature and activate your fans to help adjust your grow room’s temperature.
- Controllers like the iPonic 614 Environmental Controller help monitor and control fans, heaters, and AC units, and your grow lights, too.
The simpler you go, the more work you’ll need to do. However, the less work you want to do, the more you’re going to spend on hygrometers and controllers. It’s up to you on how much you want to spend, but you’ll definitely need something that will read your grow room environment.
6. Hanging Equipment

One thing growers overestimate is their ability to hang grow lights. In a tent it’s no problem, but hanging grow lights in your home can be very tricky. That’s why it’s important to find reliable, heavy duty hooks you can mount into your ceiling.
Installing these hooks can be the trickiest part of the process. If you don’t have a stud or beam to anchor the hook, you won’t be able to hang much weight on it. That can be a problem if you’re working with a light that weighs around 15 to 20 lbs. That’s not to say you absolutely need a beam or a stud in your ceiling, but they definitely help.
When starting out, check your ceiling to know how much weight you can hang safely above your plants. Once you know what’s possible in your home, look into the weight of the grow light you’re interested in, then make sure you get hanging hooks that work for your ceiling and your grow lights.
The final piece to your puzzle is light proofing your grow room. That means making sure that no light can come in from outside of the room, including windows and door frames.
The easiest solution is to place aluminum foil tape over the opening of your door frame. This will ensure that light from outside of your room doesn’t come in and disturb your plants when they’re in darkness.

For windows, you’ll want to go with a different form of coverage, preferably something that’ll cover them but not stick permanently. For this, you can use one of two materials:
- Mylar film can help reflect light away from your windows while preventing light leaks. This will help lower the impact that external light (i.e., the sun) has on your grow room and plants.
-
Panda film is a good option for absorbing light from outside on its black side, while reflecting light onto your plants with the white side.
- The downside to panda film is that it’s plastic, so if you’re in extremely hot conditions, film can eventually wear thin and bubble.
We should note that both mylar film and panda film are also great materials to cover your walls and even your ceiling with in order to reflect more light onto your plants. Though not completely necessary, it’s a good idea to line your walls with white panda film or silver mylar film for an extra bit of light to your plants.
- Start by measuring the height of your walls from the floorboard to the ceiling.
- Then measure the length of all of the walls in your room, adding them together to give you the total length of reflective material you’ll need.
- We suggest using wheat paste or a weather-proof adhesive to stick material to your walls.
- Take special care to keep at least four to five inches of space around electrical outlets.
Note: If you rent, chances are you can’t line your walls with reflective material, and that’s totally fine! The important thing is to be careful not to let light into your grow room from outside sources.
How Many Plants Can You Grow?

Now that you know what makes a secure grow room, let's talk about making a comfortable grow room. That starts with figuring out what types of plants you want to grow and how many you can fit in a growing area.
A good rule of thumb is to give your plants at least 1sqft of space to grow in. This will allow for plenty of airflow between untrained plants, but it can be adjusted if necessary.
With that in mind, here’s what we’ve seen works for grow rooms:
Closets (2x2ft, 2x3ft, 2x4ft) — With a 1 sqft area per plant, you're looking at growing one to two mature plants in tight growing spaces. While you could crowd another plant in there, we think it's best for airflow to have plants at least 1 sqft between them.
Some closets may have lower ceilings or shelves that limit the height you can hang your lights. Plants that get too tall can get burned or get bleached by your grow light.
Bedrooms (5x5ft, 6x6ft, 7x7ft) — In a bedroom, you can grow anywhere from four to six mature fruiting plants comfortably. Of course, you can give your plants less than 1sqft of growing room to create one large canopy instead of four to six smaller ones.
Basement (8x8ft, 9x9ft, 10x10ft) — In basements and larger spaces in your home, you can grow at least eight to ten tall, mature fruiting plants. If you plan on growing wide, bushy plants like berry bushes, you can reduce the number of plants to maximize the amount of light your plants receive.
Keep in mind that you don't have to fill your entire growing area with plants. You need sufficient room to tend to your plants. In an overcrowded grow room, tending to plants can be difficult and cause a number of problems from nutrient issues to pest infestation to illness. Not to mention you'll need room for equipment like fans and filters, and for hydroponic growers, you'll need room for reservoirs.
No matter which room in your home you choose to grow, space your plants in a way that both helps you take care of them and gives them all the light they need.
Setting Up Your New Grow Room

Now that you know what you need to start growing, it’s time to start setting up all of your equipment. It’s a pretty straightforward process that starts with the foundation and ends with your plants. So let’s get started.
- Begin by installing your window vents. Remember that cool air stays closer to the ground, so position your incoming air toward the bottom of your window. If you have an exhaust fan and/or filter, it’s best to position them toward the top of a window.
-
Next, install the light proofing to your windows, working around the vents.
- If you have reflective material, you should install it at this time as well.
- Install your hanging hooks. Each grow light should use two hooks, as should any hanging fans and filters.
- After that, you’re going to want to install your lighting. Position lights at a good height for now, because you’re going to lower them when your plants come in.
-
Next, prepare your medium, install your growing equipment, and plant your seeds.
- Soil growers, this is where you mix your soil with perlite, then fill your buckets with the medium and your plants.
- Hydroponic growers will fill their reservoirs and set up their medium (i.e., fill pots with coco coir/pebbles, or set up flood tables with rockwool cubes). Then plug in any equipment that requires electricity.
-
Install any pest preventative measures you have, like hanging sticky traps, meshing-off anything leading outside, and laying down pest traps.
- If you’re using natural predators, it’s best to release them when you suspect bugs. There’s no need to send them out right away.
-
Plug in your lights and ventilation equipment, then power them on.
- If you have a controller, set up all of the applicable equipment into it, then plug it in.
- Place any hygrometer(s) you have in your growing area near your plants. Don’t install it too close to grow lights, as the temperature near them can be higher than what it actually is.
From there, make sure to monitor your plants and inspect them often to ensure they’re growing to the best of their ability.
Turn a Regular Room Into Your Very Own Grow Room

Converting your room, basement, or even your closet into a grow room isn’t just easy — it’s smart, too. Why waste space in your home with clothes you probably won’t wear or junk you don’t need when you could be using it to grow your own plants at home?
In all fairness, you could bypass all of these steps and get a grow tent or grow kit. If you did, though, you’d need to set it up either in a closet, room, or basement. This can limit your growing potential, as well as the space inside the room around it, rendering the rest of the room potentially useless.
At the end of the day, it’s a matter of choice. If you have the room, though, you should consider using it to grow plants. It’ll save you money and effort in setting up a grow tent, and it’ll save you the hassle of walking in and out of one, too.
Of course, no two rooms are the same, so use this guide as a template for your very own grow room. Adjust it to fit your needs or implement our advice here, and in time you’ll be pumping out harvests and plants you only thought were possible outdoors.